Pizlix: Memory Safe Linux From Scratch
Pizlix is LFS (Linux From Scratch) 12.2 with some added components, where userland is compiled with Fil-C. This means you get the most memory safe Linux-like OS currently available.
Caveats:
The kernel is compiled with Yolo-C. So that you can compile the kernel, a copy of GCC is installed in
/yolo/bin/gcc.The C/C++ compiler is compiled with Yolo-C++. Some more information about that:
It's likely that a production memory safe OS would still let you run unsafe programs in cases where the security/performance trade-off was warranted. The compiler might be a good example of that.
I haven't yet ported LLVM to Fil-C++, and so long as I haven't, the compiler will have to be Yolo-C++.
The compiler is called
/usr/bin/clang-20but there are many symlinks to it (gcc,g++,cc,c++,clang,clang++,filcc, andfil++all point atclang-20).All of the other building-related tools (like
ld,make,ninja, etc) are compiled with Fil-C (or Fil-C++).
Pizlix is possible because Fil-C is so compatible with C and C++ that many packages in LFS need no changes, and the rest of them mostly just require small changes. That said, it's not as simple as just replacing LFS's compiler with the Fil-C compiler because:
The Fil-C compiler isn't set up to do the cross-compilation hacks that LFS uses in Chapters 5-7. Therefore, Pizlix uses the Yolo-C toolchain and vanilla versions of the temporary cross-tools in those chapters.
We need to retain the Yolo GCC for compiling the Linux kernel.
This document starts with a description of how to install and build Pizlix. At the end of this document, I explain exactly how Fil-C is injected into LFS.
Supported Systems
Pizlix has been tested inside VMware, Hyper-V, and QEMU on X86_64. QEMU works best.
I have confirmed that it's possible to build Pizlix on Ubuntu 22 and Ubuntu 24. The best way to build it is using an Ubuntu 22 container.
Installing Pizlix
First, clone the Fil-C GH repo:
git clone https://github.com/pizlonator/fil-c.git
Assuming you're on Ubuntu, install the following:
apt install podman parted udevadm grub-pc qemu-system-x86
Then, go to the pizlix directory under fil-c and do:
sudo ../enter_container.sh -p
This will launch a container suitable for building Pizlix. Note that this is a rootful privileged container. The purpose of using the container is to:
- prevent bad things from happening to the host if the build script has a bug (since the build script must run as root), and
- obviate the need to install all of the Pizlix build dependencies on your host.
The container should pop a shell in the pizlix directory. From inside this container, do:
./build.sh >& log.txt
You can tail -f log.txt from outside the container. The build.sh script takes a long time - several hours on my fastest box. Note that it's highly recommended that you redirect the script's output to a log file because the log spew can cause podman's tty to get stuck.
This build script produces the following artifacts:
- In the
fil-c/pizlix/lfsdirectory, you'll find a whole root filesystem of Pizlix. - Several
lfs-*.tar.gzfiles, which are snapshots of the Pizlix filesystem after each build stage. Thelfs-postlc5.tar.gzfile is the final snapshot.
Once this completes, you can run the following outside the container, in the pizlix directory:
sudo ./make_disk_image.sh
This creates a disk.img based on lfs-postlc5.tar.gz. The disk.img is suitable for use in QEMU. Additionally, this script creates a disk.vmdk file suitable for use in VMware.
Finally, you can:
./launch_qemu.sh
This launches QEMU with disk.img as the root drive with 32 CPUs and 32 GB of memory. If you want a different number of CPUs or a different amount of memory, please edit the script, or launch QEMU manually.
Using Pizlix
Pizlix by default has the following configuration:
sshdis running. It's a memory safe OpenSSH daemon!seatdis running.There is a
rootuser with passwordroot.There is a user called
pizlowith passwordpizlo. This user is a sudoer.dhcpcdis set to connect you via DHCP oneth0, which is assumed to be ethernet, not wifi.
Please change the passwords, or better yet, replace the pizlo user with some other user, if your Pizlix install will face the network!
Once you get your internet to work (it will "just work" if you use the QEMU invocation from ./launch_qemu.sh), you'll need to run:
make-ca -g
As root. Without this, curl and wget will have problems with HTTPS.
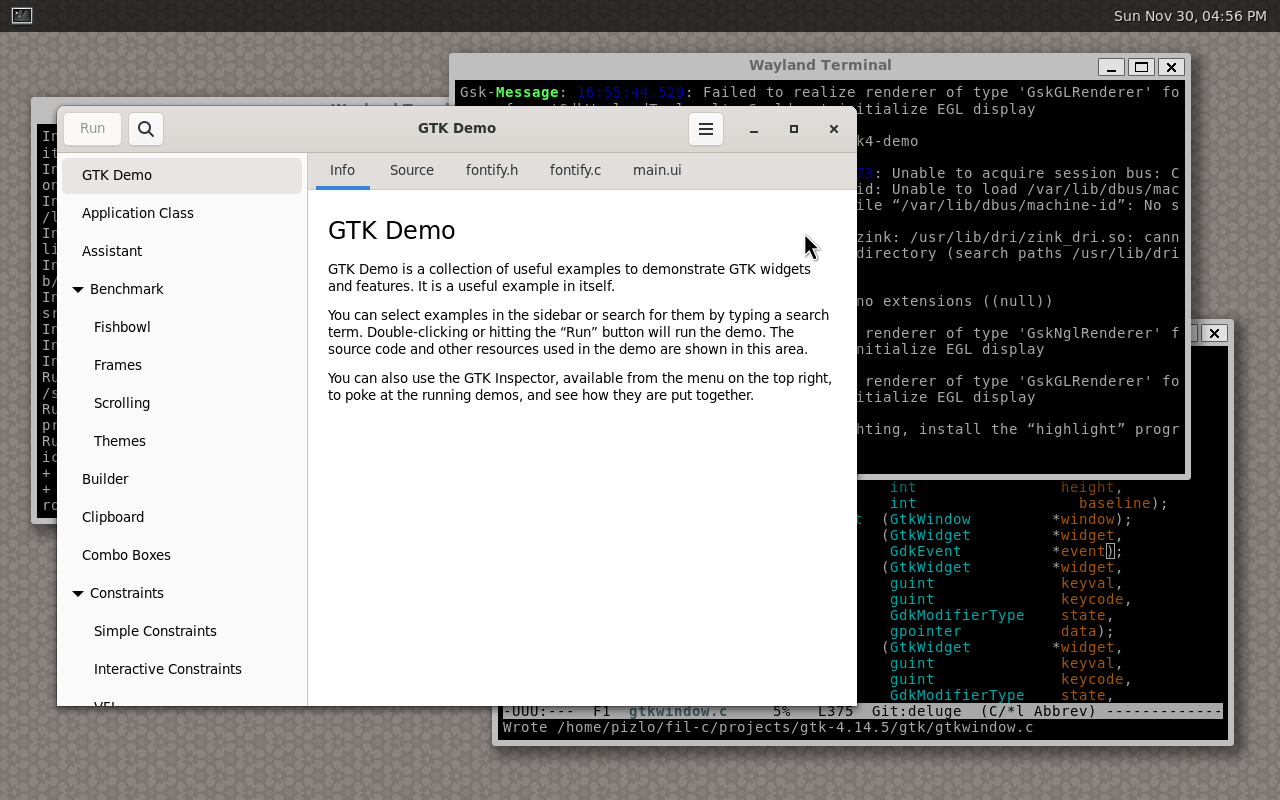
To see what this thing is really capable of, log in as a non-root user (like pizlo) and do:
weston
And enjoy a totally memory safe GUI!
Hacking Pizlix
If you want to do development on Pizlix itself, you have two options: you can work on it from within Pizlix itself, or from the container in a chroot environment.
Self-Hosted Pizlix Hacking
Pizlix comes with emacs, vim, git, and other useful things for doing software development. Therefore, it's feasible to git clone the Fil-C repository from within Pizlix. Many of my Pizlix commits were done from within Pizlix.
The main thing you cannot currently do is work on the Fil-C compiler and runtime from within Pizlix. The kind of Pizlix development that makes sense when self-hosted is porting new software. For example, my GTK port was done from within Pizlix.
Container-Hosted Pizlix Hacking
This section describes a setup for hacking that enables you to:
- See the Fil-C git checkout on the host and in the container, so that you can edit it using your favorite code editor or IDE.
- See the Pizlix root directory on the host and in the container, so that you can use a code editor on the host to view files that are part of Pizlix. Also, this way you can use whatever your favorite code search tools and clankers to inspect the Pizlix filesystem.
- Execute the Pizlix build from within a container.
- Be able to execute QEMU on the current state of the Pizlix filesystem at any time.
All of the commands in this section should be run from the pizlix directory. Most commands in this section should be run outside the container.
The first thing you'll want to do is mount the disk.img. Run this outside the container:
sudo ./mount_disk_image.sh
This will mount disk.img's Pizlix root partition in pizlix/lfs, which the container will see as /mnt/lfs. This command works even if you do not already have a disk.img. In that case, it will create one for you.
Then you can start the container:
sudo ../enter_container.sh -p
Note that the enter_container.sh and mount_disk_image.sh scripts can actually be run in any order. It's fine to first start the container, and then mount the disk image.
Now you can use your host to inspect the Pizlix partition by looking in pizlix/lfs. Or you can use the container to inspect the Pizlix partition by loooking in /mnt/lfs. And you can issue build commands from within the container, including commands that build specific stages of Pizlix.
If you want to launch QEMU, do this from outside the container:
sudo ./unmount_and_launch_qemu.sh
This unmounts the disk.img and then launches QEMU. When QEMU exits, it remounts disk.img. Unmounting disk.img is crucial, since we cannot have both the host and the QEMU guest both reading and writing to the same ext4 filesystem.
When you're done, you can:
sudo ./unmount_disk_image.sh
Note that a similar workflow works without using mount_disk_image.sh. In that case, the container's /mnt/lfs maps to the host's pizlix/lfs, but they are not live copies of the disk.img. If you're using that workflow, then to test the Pizlix build, you have to ./make_disk_image.sh - and that command does not use pizlix/lfs; instead it uses a build tarball. So, if you make manual changes to the lfs directory, then it's up to you to create a tarball of the lfs directory's contents and then do:
sudo ./make_disk_image.sh <your tarball>
Build Stages
The Pizlix build proceeds in the following stages.
The Pizlix build snapshots after each successful stage so that it's possible to restart the build at that stage later. This is great for troubleshooting!
All of the commands in this section should be run from within the container.
Pre-LC
This is the bootstrapping phase that uses a Yolo-C GCC to build a Yolo-C toolchain within the /mnt/lfs chroot environment.
If you want to just do this stage of the build and nothing more, do ./build_prelc.sh.
If you want to start the build here, do ./build.sh.
LC
This is the phase where the chroot environment is pizlonated with a Fil-C compiler. This builds the Fil-C compiler and slams it into /mnt/lfs.
If you want to just do this stage of the build and nothing more, do ./build_lc.sh.
If you want to start the build here, do ./build_with_recovered_prelc.sh.
The Injecting Fil-C Into LFS section describes the LC phase, and its relationship to Pre-LC and Post-LC.
Post-LC
This is the actual Linux From Scratch build (Chapters 8, 9, 10 of the LFS book) using the Fil-C toolchain. After this completes, the Yolo-C stuff produced in Pre-LC is mostly eliminated, except for what is necessary to run the Fil-C compiler and the GCC used for building the kernel.
If you want to just do this stage of the build and nothing more, do ./build_postlc.sh.
If you want to start the build here, do ./build_with_recovered_lc.sh.
Post-LC 2
This builds BLFS (Beyond Linux From Scratch) components that I like to have, such as openssh, emacs, dhcpcd, and cmake.
If you want to just do this stage of the build and nothing more, do ./build_postlc2.sh.
If you want to start the build here, do ./build_with_recovered_postlc.sh.
Post-LC 3
This builds the Wayland environment and Weston so that you can have a GUI.
If you want to just do this stage of the build and nothing more, do ./build_postlc3.sh.
If you want to start the build here, do ./build_with_recovered_postlc2.sh.
Post-LC 4
This builds GTK 4.
If you want to just do this stage of the build and nothing more, do ./build_postlc4.sh.
If you want to start the build here, do ./build_with_recovered_postlc3.sh.
Post-LC 5
This is a work-in-progress stage to build WebKitGTK.
If you want to just do this stage of the build and nothing more, do ./build_postlc5.sh.
If you want to start the build here, do ./build_with_recovered_postlc4.sh.
Other Tricks
You can mount the chroot's virtual filesystems with ./build_mount.sh. You can unmount the chroot's virtual filesystems with ./build_unmount.sh.
You can hop into the chroot with ./enter_chroot.sh. However, if you're past Post-LC, then you'll need to do ./enter_chroot_late.sh instead.
If you want to just rebuild libpizlo.so runtime and slam it into the chroot, do ./rebuild_pas.sh.
If you want to just rebuild the compiler, libpizlo.so, and user glibc, do ./rebuild_lc.sh.
Injecting Fil-C Into LFS
My process for building Pizlix started with writing shell scripts to automate the LFS build. This mostly involved copy-pasting the shell commands from the LFS book after manually validating that they worked for me.
Then, I studied the build process to identify the best injection point for Fil-C. That is, where to either compile or binary-drop the Fil-C compiler and have all subsequent build steps use that compiler. After some trial and error, I found that the second glibc build step (the one at start of Chapter 8) is the perfect point to transition from Yolo-C to Fil-C:
At this point, we are no longer building temporary cross versions of libraries in tools. We're building the final versions.
We have built good-enough versions of libraries and tools to support running the Fil-C compiler. Note that in preparation for this, I had already adjusted the clang build so that the binary has minimal dependencies and happens to dynamically link to a glibc with the same ABI version as LFS's glibc (version 2.40). It's great that glibc ABI is so stable these days that this is possible!
This is why the build stages have the names that they have:
Pre-LC: this is the "pre libc" part of the build, i.e. Chapters 5-7.
LC: this is the part of the build where LFS would have normally build the final (not cross) version of glibc, i.e. section 8.5.
Post-LC: this is all of the LFS build that happens after the final glibc step, i.e. everything after section 8.5. However, I also include the section 8.3 man-pages and section 8.4 iana-etc as the first steps of Post-LC. It turns out that it's OK to run these steps after the final glibc build.
Here's how the various build stages are modified to support Fil-C.
Modifying Pre-LC
In normal LFS, most of the Pre-LC tools are built with --prefix=/usr even though these are not the final versions of the tools. Post-LC overwrites the tools build in this bootstraping phase.
It turns out that I cannot quite do this for Fil-C, because Fil-C does not share ABI with Yolo-C. So, we do not want situations like:
Pre-LC builds library
libfoo.so.Pre-LC builds a binary
barthat dynamically linkslibfoo.so.Post-LC builds library
libfoo.soand overwrites the version from Pre-LC.
If we did that, then bar would stop functioning, since bar is a Yolo executable and libfoo.so is now a Fil library. The same kind of problem would occur if in step 3, Post-LC built bar with Fil-C - we'd have a Fil binary dynamically linking to a Yolo library. It wouldn't work!
So, Pre-LC takes the following approach:
We build everything with
--prefix=/yolo.We use symlinks to make it seem like everything is in
/usr. For example,/usr/binis a symlink to/yolo/binand/usr/libis a symlink to/yolo/lib. Also,/binis a symlink to/usr/binand/libis a symlink to/usr/lib.
At the end of Pre-LC, all libraries and binaries are actually installed in /yolo, but they function as if they were installed in /usr in the sense that the glibc loader is going to look for libraries in /lib and lots of software (like lots of shell scripts) point at /bin or /usr/bin directly.
Modifying LC
The LC phase is where most of the magic happens. LC has multiple substages: Fil-C build, yoloify, yolo glibc build, Fil-C binary drop, user glibc build, and finally libc++ binary drop. Note that the need for two glibcs - yolo and user - is due to the libc sandwich runtime.
Fil-C Build
The first stage of LC is to build Fil-C in a way that is almost identical to ./build_all_fast_glibc.sh except that we force the use of the kernel headers from the version of the kernel that Pizlix uses. We will use the clang compiler binary, libpizlo.so, libc++abi, and libc++ libraries as binary drops into Pizlix in later parts of LC.
This also packages up yolo glibc and user glibc so that they can be built inside the Pizlix chroot.
Yoloify
Now we break the symlinks from /usr to /yolo. To do this without breaking the bootstrap binaries, we also patchelf all of the binaries so that:
They know that the ELF interpreter (i.e. ELF dynamic loader) is in
/yolo/lib/ld-linux-x86-64.so.2.They know that their rpath is in
/yolo/lib.
Also, all scripts that use absolute paths to their interpreter (i.e. #!) is in /yolo/bin.
Yolo glibc Build
Now we build yolo glibc (i.e. the version of glibc 2.40 hacked to be the Yolo libc in the Fil-C sandwich runtime) inside the Pizfix chroot. This is a very hacked glibc build:
We build yolo glibc using GCC, since it's a Yolo-C component that sits below the Fil-C runtime.
We disable a bunch of features, since Fil-C only uses this libc for syscalls in the Fil-C runtime. In the future, we could even get rid of the yolo libc altogether!
We pretend that
--prefix=/usr. In some ways, that's true.After glibc is installed, we delete everything it places in
/usrexcept for thelibc,libm, andld-linux-x86-64.so.2shared objects.We rename those shared objects so that
libc.so.6becomeslibyolocimpl.so,libm.so.6becomeslibyolomimpl.so, andld-linux-x86-64.so.2becomesld-yolo-x86_64.so.
Now, the yolo glibc is installed in such a way that libpizlo.so and the Fil-C compiler know how to find it. And, most importantly, it's installed in such a way that it stays out of the way of the user glibc (which will claim the libc and libm library namespace).
Fil-C Binary Drop
This part is very hackish! I haven't ported libpizlo.so to build with GCC. So, rather than porting it or having Yolo clang in Pre-LC, this step just binary drops the libpizlo.so we've already built into /usr/lib. This also drops the Fil-C headers into /usr/include.
This step also binary drops the Fil-C compiler - a clang binary that only dynamically links glibc ABI version 6 - into /usr/bin and sets up the symlinks (so gcc, g++, cc, c++, clang, and clang++ all point to this compiler).
User glibc Build
Now we build user glibc (i.e. the version of glibc 2.40 that has been ported to Fil-C) inside the Pizfix chroot. This is almost exactly the build process used in Section 8.5 of LFS, except we're using a version of glibc 2.40 that has been ported to Fil-C and we're compiling with the Fil-C compiler rather than GCC.
libc++ Binary Drop
Ideally, we'd build libc++abi and libc++ within the Pizfix chroot, but for now I'm being lazy so I just binary drop the versions I've already built.
This concludes the LC phase! Now it's possible to proceed with the rest of the LFS build. That build will end up using the Fil-C compiler even if the build scripts explicitly ask for gcc or g++, and they will get a Fil-C version of glibc, and libc++abi/libc++ as their C++ libraries.
Modifying Post-LC
Post-LC is almost exactly the LFS chapters 8-10 except for the glibc step (which we already did in the LC phase). The only changes are:
Some programs required minor modifications to work in Fil-C.
The Linux kernel needs to be built using two compilers. The "host" compiler is the Fil-C compiler. So, there are minor changes in the userlevel parts of the Linux kernel and the exact commands used to invoke the build are a bit more verbose.
Pizlix also includes Post-LC 2, Post-LC 3, Post-LC 4, and Post-LC 5 phases that build some parts of BLFS 12.2 plus enough to run Weston and GTK 4.